
Emergency lighting fixtures are ever-present in public and business buildings throughout the country, so omnipresent that we often forget they are there at all -- until the moment we need them.
These life-saving lighting systems exist as we know them due to stringent standards for where they are required, what they must look like, and how they operate during various real emergency situations.
Pressure for properly installed and maintained emergency lights comes from multiple parties, including OSHA for commercial buildings and commercial insurance companies. But it's a random Fire Marshall inspection, applying NFPA Life Safety Code standards that will be the most likely and most common point when emergency lighting code requirements are put to the test.
Here are three crucial tips for making sure emergency lighting code requirements are met when your lighting is newly installed or updated the first time, rather than requiring expensive rework in the wake of a bad Fire Marshall review:
Give Exit Sign Placements the Eye Test
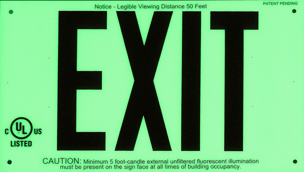
The NFPA guidelines require exit signs to be unobstructed and completely visible from either the sign's rated viewing distance (based on the size of the room or corridor) or a maximum distance of 100 ft.
This means no decorations, no obstructing shelves, or anything that prevents a clear sight line to the exit sign.
While an experience Fire Marshall will of course apply stringent standards to their version of this test, the basics of this standard are easy to test and understand. You may be a few simple pushes of furniture away from having a full safe and compliant exit sign placement.
This is also a good opportunity to make sure exit lights in particular have colors that properly contrast the standard lighting or decor around them. If you've ever wondered why exit signs sometimes have different colors depending on the building, this is one of the main reasons.
For example: A new red paint job in a hallway means switching to a green exit sign will keep the Fire Marshall from shaking their head at your emergency lighting installation.
Test Emergency Lighting Modes
Emergency lighting often has two functions: a normal mode where signs are clear and legible but not obtrusive, and an emergency mode meant to increase legibility and visual locating under high-pressure circumstances such as fires or power outages.
Some required emergency lights only provide external illumination in the event of an emergency, making these even more crucial to check up on. Not only for the sake of an impending inspection, but also to protect people in potentially dangerous situations where these lights could quite literally save their lives.
Don't wait for the Fire Marshall to find an improperly functioning emergency mode -- or for your insurance company to find out about a flaw. Either plan a day for a building-wide drill with full emergency lighting functionality in use, or come up with a checklist of individual emergency light modes to test one-by-one.
The NFPA recommend conducting tests monthly, making sure emergency lighting modes function as intended for a full 30 seconds. They also suggest full drills every 1.5 years, keeping emergency lighting on for at least 90 minutes to properly simulate a demanding emergency scenario.
Avoid "Fly By Night" Contractors
Poor emergency lighting installations end up leading to costly rework -- and often, the original contractor will avoid responsibility for the mistakes made.
Building owners need contractors that they can depend on to know emergency lighting standards and codes completely on their own -- and who avoid using subcontractors who often muddy the waters between what is promised and the work that actually gets done.
If you are interested in emergency lighting installation and upgrades provided by experienced, accountable self-performing professionals, contact us at Lighting Services, Inc. today.
